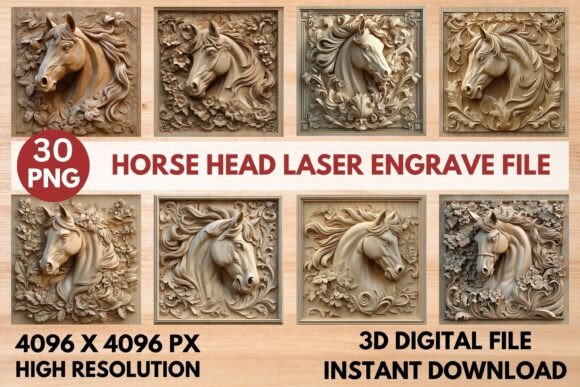
Mastering the Horse Head Laser Engrave File for Professional Results
Creating stunning laser-engraved art requires more than just a high-quality machine; it demands the right digital assets. The Horse Head Laser Engrave File has become a staple for creators looking to add elegance and precision to their projects. Whether you are crafting home décor, customizing stationery, or designing fashionable clothing prints, this premium PNG design offers a versatile foundation. However, many users stumble not because of their equipment, but due to misunderstandings about how to prepare and use these specific digital files. By addressing common pitfalls early, you can ensure sharp, intricate, and professional results every time.
Understanding the Difference Between Color and Grayscale
One of the most frequent mistakes beginners make is assuming that any image file will work equally well for laser engraving. This particular package includes both coloring PNGs and grayscale PNGs, each serving a distinct purpose. Using a standard color image when a grayscale map is required often leads to washed-out details or inconsistent depth in the engraving.
The grayscale quality of this file is specifically crafted for laser machines. In laser engraving, darker pixels typically correspond to higher power or slower speeds, creating deeper marks, while lighter pixels result in shallower etches. If you attempt to use the coloring version without proper conversion, your software may struggle to interpret the depth cues, resulting in a flat, unimpressive finish. Always verify that you are selecting the grayscale variant when aiming for 3D-like depth effects on wood or leather.
Compatibility Checks Before You Buy
It is easy to get excited about a design and overlook technical compatibility. This Horse Head Laser Engrave File is optimized for popular platforms like LightBurn, xTool, Glowforge, Sculpfun, and CO₂ Laser Cutting Machines. However, "optimized" does not mean "universal." A common oversight is failing to check if your specific software version supports the dithering filters required for high-quality grayscale reproduction.
For instance, LightBurn users benefit from the Jarvis filter, which is pre-applied or recommended for this file to ensure accurate tonal reproduction. If you are using different software, you must understand how it handles grayscale images. Some programs automatically convert grayscale to black and white, losing all the subtle shading that makes this design striking. Before purchasing, take a moment to review your machine’s manual or community forums to confirm it can process high-resolution grayscale PNGs effectively.
Resolution and Resizing Responsibilities
The file comes in a high resolution of 4096 x 4096 pixels with a transparent background. While this sounds ample, a critical error occurs when users resize the image improperly. Stretching a small image to fit a large wooden panel will result in pixelation, ruining the professional look. Conversely, shrinking it too much without maintaining aspect ratio can distort the horse’s features.
Remember, the buyer is responsible for resizing the file to fit their chosen product. Do not rely on automatic scaling features in your laser software without previewing the result. Use graphic design tools to adjust dimensions while locking the aspect ratio. This ensures the intricate details of the horse’s mane and facial structure remain crisp. If you are working on a small item like a coaster, ensure the level of detail is still visible at that scale; sometimes, simplifying the design or reducing the engrave area yields better clarity than forcing a complex image into a tiny space.
Material Selection Matters
Even with the perfect file, the material you choose plays a pivotal role in the outcome. The recommended settings for this design suggest it works best on lighter wood. Dark woods or heavily stained surfaces can absorb the laser energy differently, causing the grayscale nuances to disappear. The contrast between the burned area and the natural wood grain is what creates the visual impact.
If you attempt to engrave this on dark walnut or ebony without testing, you may find the image lacks definition. For darker materials, consider adjusting the power and speed settings significantly or using a masking technique to protect the surface and enhance contrast. Always perform a test run on a scrap piece of the same material. This simple step saves time, money, and frustration by allowing you to fine-tune the settings before committing to your final project.
Optimizing Settings for Glowforge and LightBurn
Specific settings can make or break your project. For Glowforge users, the recommended parameters are Speed 1000, Power 90, Grayscale Vary Power, Max Quality 5, Lines Per Inch 270, and 1 Pass with No Masking. Deviating wildly from these baselines without understanding why can lead to charring or incomplete engravings.
- Speed and Power Balance: Too much power at low speed burns the wood deeply but may lose fine detail. Too little power leaves the image faint.
- Lines Per Inch (LPI): A setting of 270 LPI provides a smooth gradient. Lowering this can create a dotted appearance, while raising it may increase engraving time without noticeable quality gains.
- Dithering: In LightBurn, ensuring the Jarvis filter is active helps simulate continuous tones through patterned dots, essential for the realistic look of the horse’s coat.
These settings are starting points. Environmental factors, lens cleanliness, and machine age affect performance. Keep a log of your tests to refine your approach for future projects.
Expanding Your Creative Applications
Many users limit themselves to wood plaques, but this Horse Head Laser Engrave File is versatile. It can elevate textile designs, paper crafts, packaging, and tableware. When applying it to non-wood materials, such as coated metals or acrylics, the grayscale interpretation changes. On acrylic, the laser frosts the surface, so the contrast relies on the density of the frosting rather than burn depth.
For textile applications, ensure the fabric can withstand the heat without melting or scorching excessively. Natural fibers like cotton or linen tend to respond better to laser engraving than synthetics. By experimenting with different substrates, you can expand your product line and offer unique items to customers. Just remember to adjust your power and speed settings accordingly for each new material type.
Final Checks for Professional Quality
Before hitting the start button, do a final review. Check that the file is indeed the grayscale PNG and not the coloring version. Verify the dimensions match your material. Ensure your lens is clean and your focus is precise. These small steps prevent costly errors and ensure that the intricate details of the horse head are rendered with the precision they deserve.
By avoiding these common mistakes and understanding the technical requirements of the Horse Head Laser Engrave File, you can consistently produce high-quality, professional-grade engravings. Whether you are a hobbyist creating gifts or an entrepreneur building a brand, attention to detail in file preparation and machine setup is the key to success.