Integrating the Halloween Pumpkin Figurine Cut File into Your Creative Workflow
For digital creators, laser cutting enthusiasts, and small business owners, the transition from a digital concept to a tangible product is where value is created. The Halloween Pumpkin Figurine - Cut File represents more than just a seasonal decoration; it is a structured asset designed to streamline the production process for layered wooden crafts. Whether you are preparing for a holiday market, updating your home decor, or looking for an engaging educational project, understanding how to integrate this specific design into your existing workflow can significantly enhance efficiency and output quality.
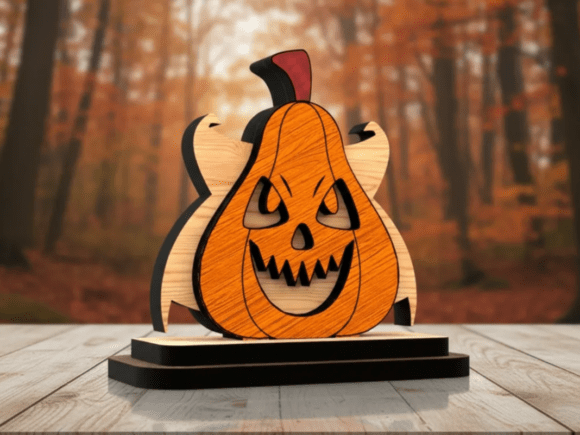
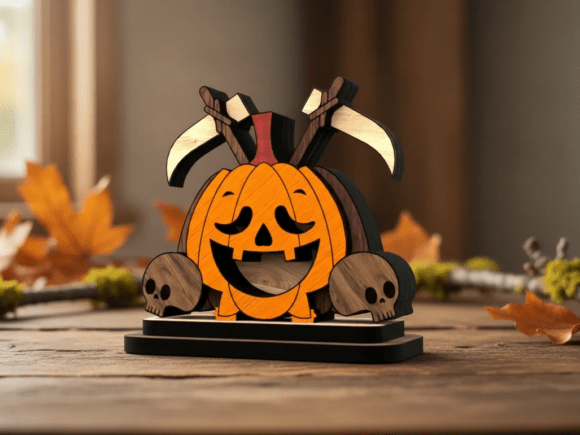
This layered wooden design features a Jack-o’-lantern accompanied by two skulls and crossed scythes, creating a playful yet eerie atmosphere that appeals to a broad demographic. By utilizing ready-to-cut files in formats such as SVG, DXF, AI, PDF, and EPS, you eliminate the time-consuming phase of vector creation and focus entirely on material selection, machine calibration, and assembly. This article explores how to effectively incorporate this cut file into your creative or commercial processes, ensuring consistent results and maximizing the utility of your laser cutting equipment.
Preparation and File Compatibility
The foundation of any successful laser cutting project lies in proper file preparation. The Halloween Pumpkin Figurine - Cut File is engineered for compatibility with major design software and laser control systems. Before sending the job to your machine, it is crucial to verify that the vector paths are closed and that line colors correspond correctly to your machine’s power and speed settings for cutting versus engraving.
Since the design includes multiple layers intended to create a three-dimensional effect, organization is key. Open the file in your preferred vector editor—such as Adobe Illustrator, CorelDRAW, or Inkscape—and inspect the layer structure. Ensure that the slots and tabs are clearly defined. This step prevents common errors such as missed cuts or misaligned layers during assembly. For professionals managing multiple projects, saving a customized template with pre-set cut parameters for 3 mm materials can reduce setup time for future runs.
Compatibility extends beyond software. The file is optimized for various materials, including plywood, MDF, and acrylic. Each material interacts differently with laser beams, so adjusting your focus and air assist settings is necessary. Plywood offers a rustic, warm aesthetic that complements the Halloween theme, while acrylic provides a sleek, modern look with high contrast. Testing a small section of the material before running the full batch ensures that the kerf width—the amount of material burned away by the laser—does not compromise the slot-fit construction.
Material Selection and Machine Setup
Selecting the right material is a critical decision point in the production workflow. The Halloween Pumpkin Figurine - Cut File is specifically designed for a material thickness of 3 mm. Using material that deviates significantly from this specification can result in loose joints or parts that do not fit together without excessive force. For hobbyists and educators, 3 mm birch plywood is often the most forgiving and cost-effective option. It cuts cleanly and sands easily if minor charring occurs.
When setting up your laser cutter, consider the grain direction of wood-based materials. Aligning the grain parallel to the longest edges of the figurine can enhance structural integrity and visual appeal. For those using MDF, ensure that the material is free from voids and has a consistent density to prevent uneven cutting depths. Acrylic users should apply masking tape to protect the surface from smoke residue and scratches during handling.
Efficiency in machine setup also involves nesting. If you are producing multiple units for sale or gifts, arrange the components on the material sheet to minimize waste. Most laser software includes nesting tools that can automatically optimize placement. However, manual adjustment may be required to maintain the orientation of the grain or to separate intricate details like the scythe blades and skull features to prevent heat buildup.
Assembly and Quality Control
One of the standout features of this design is its slot-fit construction, which requires no glue. This aspect simplifies the assembly process and makes it accessible for users with varying skill levels, including students and beginner crafters. However, achieving a professional finish requires attention to detail during the post-processing phase.
After cutting, remove the pieces carefully to avoid breaking delicate tabs. Light sanding may be necessary to remove char marks or rough edges, particularly on plywood. Use fine-grit sandpaper to smooth the surfaces without altering the dimensions of the slots. Consistency in sanding ensures that all layers fit together snugly. If the fit is too tight, gently sand the edges of the tabs; if too loose, consider adjusting the kerf compensation in your software for future cuts.
Assembly should follow a logical sequence, typically starting from the base and working upwards. The layered design creates depth, so aligning the Jack-o’-lantern face with the underlying skull and scythe elements is crucial for the intended visual impact. Take time to dry-fit the pieces before finalizing the arrangement. This step allows you to check for alignment issues and make minor adjustments without committing to a permanent structure.
For those looking to add a unique touch, painting or staining the individual layers before assembly can enhance the eerie atmosphere. Acrylic paints work well on wood and acrylic, allowing for vibrant oranges, deep blacks, and metallic accents. Applying a clear sealant after painting protects the finish and adds durability, making the figurine suitable for long-term display or repeated handling.
Strategic Applications and Use Cases
Understanding where the Halloween Pumpkin Figurine - Cut File fits into broader projects helps maximize its value. For small business owners and entrepreneurs, this design serves as an excellent entry-level product for seasonal sales. Its relatively small assembled dimensions of 150 × 120 × 40 mm make it easy to ship and store, reducing logistical overhead. Bundling the figurine with other Halloween-themed items can increase average order value and attract customers looking for cohesive decor sets.
Educators and workshop leaders can use this project to teach principles of design, engineering, and manufacturing. The layered construction illustrates concepts of tolerance, fit, and spatial reasoning. Students can experiment with different materials and finishes, learning how material properties affect the final outcome. The no-glue assembly method is particularly advantageous in classroom settings, as it reduces mess and cleanup time.
For interior designers and event planners, these figurines offer a customizable decor element. They can be scaled or modified slightly to fit specific themes, such as a haunted house party or a autumn-themed wedding. Placing them on tabletops, mantels, or shelves adds a spooky yet sophisticated touch. The ability to produce them quickly allows for last-minute adjustments to decor plans, providing flexibility in dynamic event environments.
Long-Term Value and Workflow Integration
Integrating the Halloween Pumpkin Figurine - Cut File into your regular workflow offers long-term benefits beyond a single holiday season. The skills developed in preparing, cutting, and assembling this design are transferable to other layered projects. Establishing a standardized process for handling SVG and DXF files improves overall productivity and reduces errors in future tasks.
Maintaining a library of tested cut files, along with documented machine settings for different materials, creates a valuable resource for ongoing projects. This knowledge base allows for quicker turnaround times and consistent quality, which is essential for building a reputation as a reliable creator or supplier. Additionally, the modular nature of the design encourages experimentation. You might explore variations in color schemes, lighting integration, or mounting options to keep the product fresh and engaging.
Ultimately, the success of using this cut file depends on careful planning and execution. By focusing on preparation, material compatibility, and precise assembly, you can transform a digital template into a high-quality physical object. Whether for personal enjoyment, educational purposes, or commercial gain, the Halloween Pumpkin Figurine - Cut File provides a robust framework for creative expression and practical implementation.